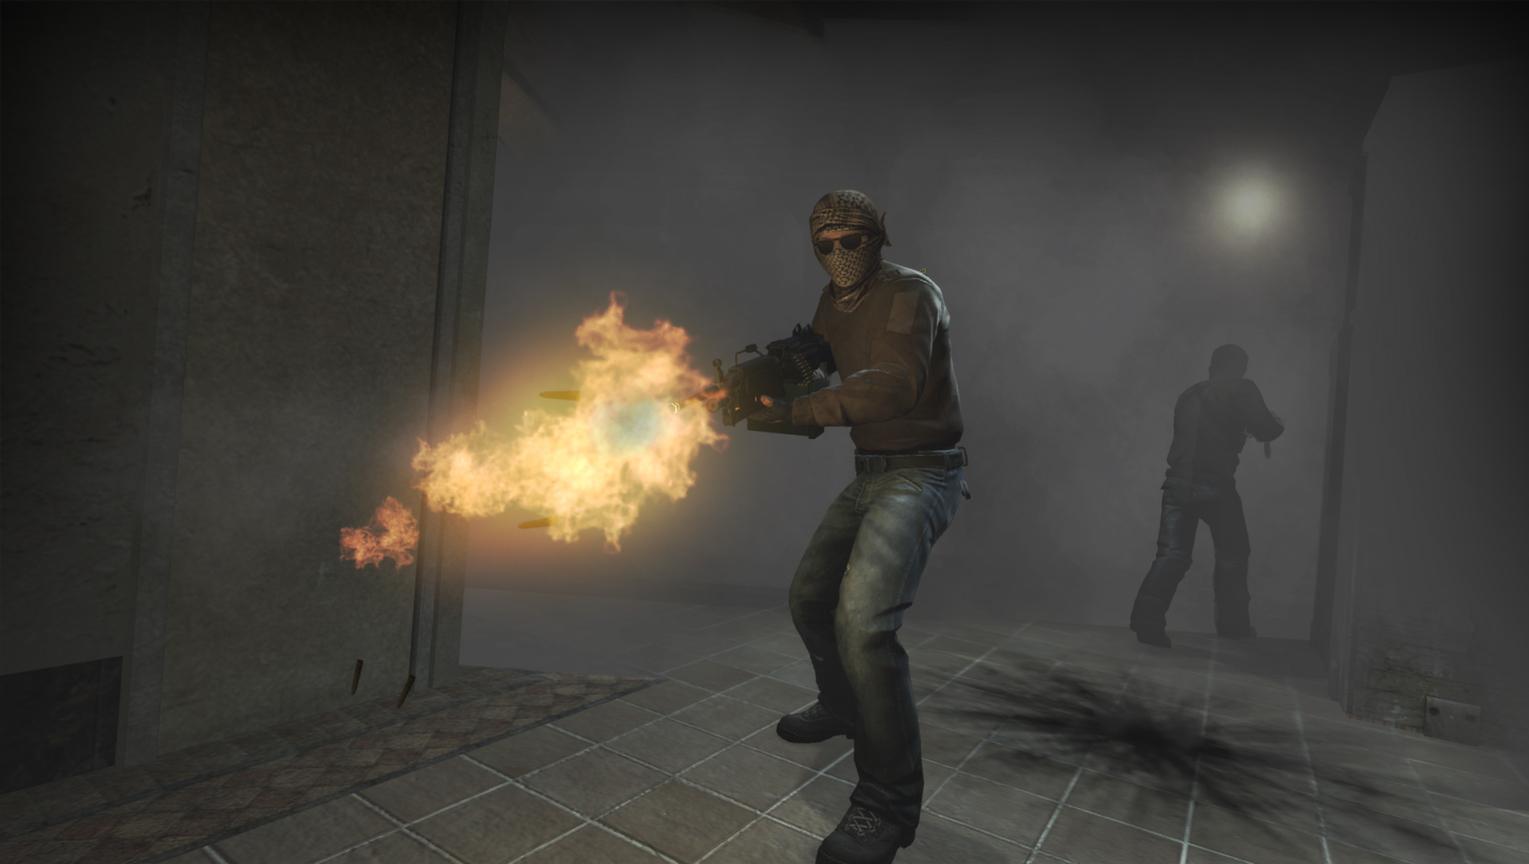
These easy Windows registry tweaks can help to speed up CSGO
Counter-Strike: Global Offensive doesn’t always play nicely with Microsoft’s operating system, so here are three Windows tweaks that every player should consider using.
Windows 10 comes packaged with some pretty cool software, but CSGO’s aging engine can get bogged down by such features as the Game Bar, Game DVR, and a Windows Update setting that allows the computer to host update files for other systems. So to help players get the most out of CSGO, here are a few Windows tweaks to speed up frame rates and make a clearer path for the game’s network traffic.
Note that the first tip involves making changes to the Windows registry. It is recommended that users backup their registry before making any such changes.
Windows Tweaks to speed up CSGO and increase FPS
The first change players can make is directly related to Windows Game Bar and its DVR function. While the software can be useful for recording gameplay, it’s often not worth the frames it takes when it’s left on.
Step 1: Turn off Windows Game Bar in Windows Settings
Since we’re going to turn off Game Bar in the registry in step two, players should make sure that the service is set to “off” in the Windows settings to avoid any conflicts. First, search “settings” in Windows 10 and select the “Gaming” section.
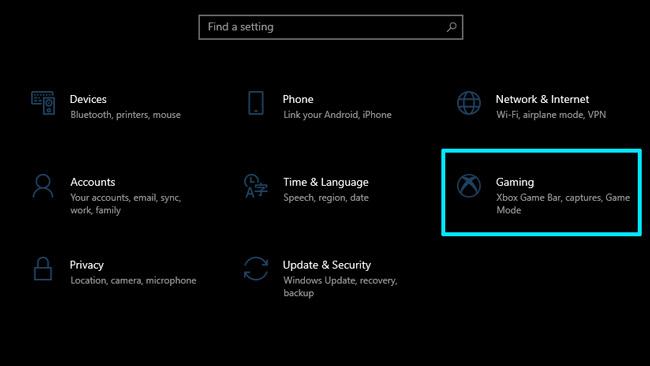
Under the gaming section, disable the Xbox Game Bar by turning the toggle to the “off” position.
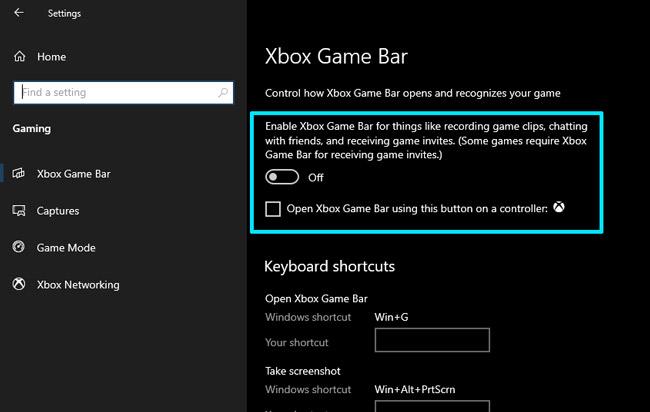
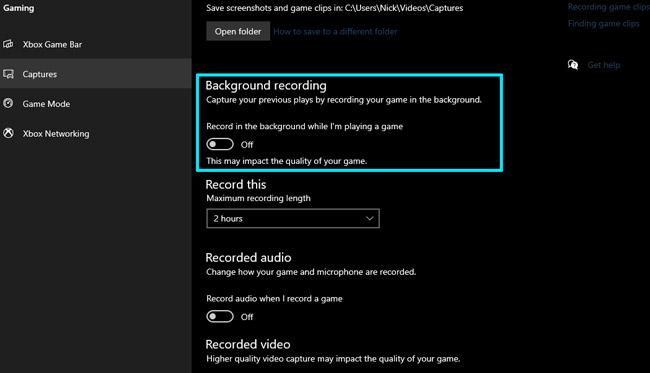
In the next tab on the left labeled “Captures,” make sure that the switch under “Background Recording” is also set to “off.” The text above the switch will say “Record in the background while I’m playing a game.”
On the left side, move on section down to “Game Mode” and once again make sure the switch for the setting is set to “off.”
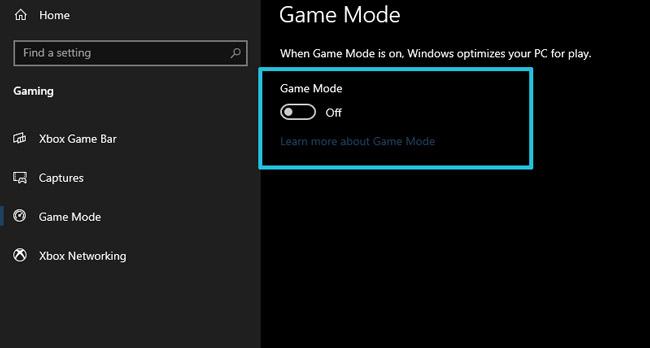
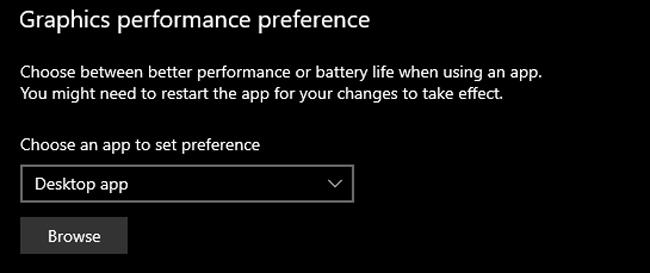
Finally, newer versions of Windows 10 have integrated manufacturer graphics settings from distributors such as Nvidia into this area. Check to see if your version has “Graphics settings” listed under the header “Related Settings” on the right-hand side. If it does, click through to the graphics settings page and find the drop down menu for “Graphics performance preference.” Make sure this is set to “Desktop app” and not “Microsoft Store app.”
Step 2: Turn off Windows Game Bar and DVR in the Windows Registry
Open Windows’ run dialogue by searching “run” in the search bar. Once open, type “regedit” and click “run.” Alternatively, users can type “regedit” directly into Windows Search. When opened, Windows may prompt users for Administrative Access. Select “yes.”
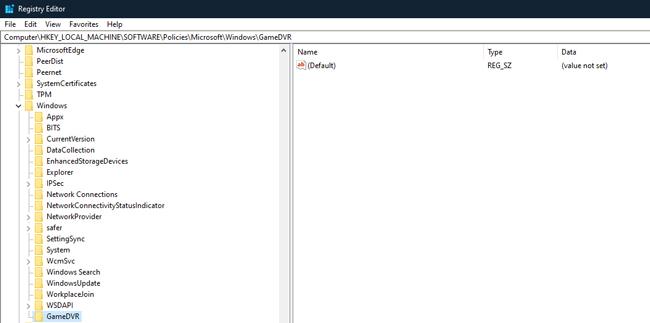
This will open the Windows registry editor. In the search bar at the top, type or copy and paste the following:
- HKEY_LOCAL_MACHINE\SOFTWARE\Policies\Microsoft\Windows\GameDVR
If you hear an error sound, you’ll have to create the entry for GameDVR. Right click on the opened Windows folder, click “New,” and select “Key” from the popout menu. What looks like a new folder will appear named “New Key.” Rename this to “GameDVR”.
On the right side of the window, there should only be a single entry.
- (Default) REG_SZ (value not set)
Leave that as it is and right click in the empty space underneath it. Click “New” and then select DWORD (32bit).
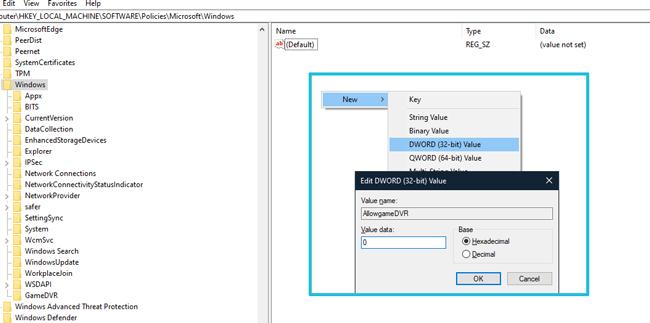
Name the new DWORD you’ve just created “AllowgameDVR”. If you’ve just created the key, the default value should be 0x0000000 (0). If your PC already has an entry for the key, double click “AllowgameDVR” and make sure the “Value data” field is set to 0 as shown above. Press okay and exit.
Windows’ built in DVR should now be turned off, freeing up resources that can help CSGO run more smoothly. Next up, we’ll take a look at a Windows Update setting that can eat up much needed bandwidth.
Turn off Windows Update seeding to speed up CSGO network traffic
After messing around in the registry, this tweak is a piece of cake. Windows 10 introduced a feature that allows other computers to download Windows updates from your PC like an old school torrent.
That doesn’t help anyone but Microsoft, and it certainly doesn’t help CSGO’s network traffic get a clear path to Steam’s servers. We’ll also limit how much bandwidth Microsoft will use to download updates in the background.
Step 1: Navigate to the Windows Update settings
Search “Windows update settings” in the Windows search bar. Once inside, turn off “Allow downloads from other PCs.”
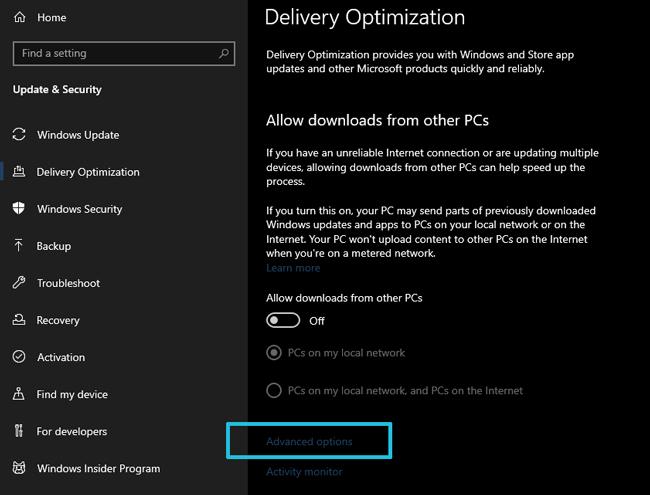
Step 2: Disable Windows Delivery Optimizations
Underneath “Allow downloads from other PCs,” click “Advanced Options” and make sure “Absolute Bandwidth” is selected. Check both boxes starting with “Limit how much bandwidth…” and enter “.1” in both boxes.
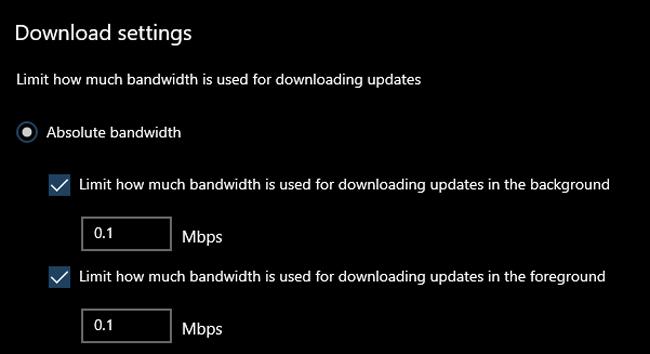
This setting puts a limit on how much of a network connection Windows will use when downloading updates in the background. Capping this can free up space for CSGO’s packets to reach Steam’s servers.
Note that these methods are not gauranteed to make a big difference for every player. Windows updates also have a nasty habit of resetting these fixes, so it’s worth checking back after Windows installs any updates to see if they’ve been changed. Fans will have to wait until Valve brings CSGO’s engine to a place where it plays nice with Microsoft, but it may take a couple tweaks to make sure the game runs smoothly on Windows 10 until then. That said, Microsoft is just as big of a reason as Valve for the game sometimes having troubles on the popular operating system.
Until either software giant comes to the table to work out the kinks between the PC’s most popular operating system and its most popular gaming app, users might have to keep searching for workarounds for both.
Recommended

s1mple is offering lessons to help you get good at CS2
Have you dreamed of playing like s1mple?

Recent CS2 ban wave punishes cheaters during live games
Valve is banning players in bulks.

Players hopeful after Valve adds Overwatch to expose CS2 cheaters
Only “trusted” players will be Overwatch investigators.


