Kirby and the Forgotten Land demo guide and early tips & tricks


Kirby and the Forgotten Land launched a demo in early March that gave fans a taste of what’s to come when the game launches in just a few short weeks.
Kirby and the Forgotten Land’s demo has single and co-op options, meaning a friend can join in on the limited-time Kirby experience. Players are then given two choices: Wild Mode and Spring-Breeze Mode. Spring-Breeze Mode is a simpler mode that gives Kirby a lot of health. It’s for players who are new to action games. Wild Mode is, well, a bit wilder. It’s far more challenging, giving players greater rewards for their efforts.
What is Spring-Breeze mode in Kirby and the Forgotten Land?
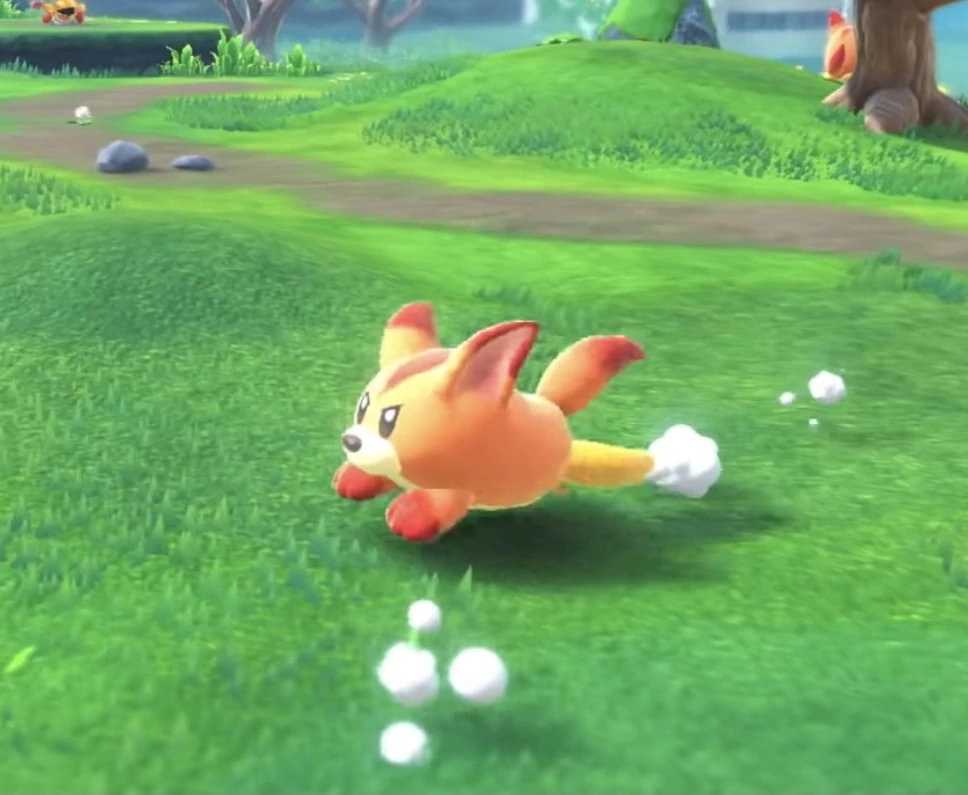
Spring-Breeze Mode opens up with a stunning short video of Kirby curiously wandering along a forest path. But he is soon met with stormy weather and an ominous force sucking Waddle Dees and other objects into star-shaped holes in the sky.
Kirby gets suctioned into the black hole-like force as well, forcing him to change shapes against his will. He then lands on the beach that we see in the first Kirby and the Forgotten Land trailer, giving fans a small hint as to how Kirby ended up in such a mysterious location.
How to beat Point of Arrival
At this point there is only a straight line ahead made available to the player, allowing players to practice Kirby’s movement. Use the stick to choose a direction, A to jump, and B to inhale. Kirby has about 10 jumps until he starts to float back to the ground, and roughly 15 total jumps until he absolutely must land.
Collecting coins is an important aspect of this mode. Most are easily visible but you’ll see a sparkly shimmer as you approach the first object you can inhale. Jumping onto this rock reveals three hidden coins. Spitting the box out at the larger box will break it, giving you three more coins.
A Garlfi can be found a bit further down the map. He is guarding a box but won’t hurt you. Inhale him and spit him out at the box to reveal a cherry.
Walking down the path a bit more you will come across a more expansive map that’s similar to those seen in the Kirby and the Forgotten Land trailers. Here, inhale the sword-wielding enemy to get the Sword copy ability. The sword can be used with B, allowing Kirby to break objects such as trash cans and eithre reveal coins or attack enemies.
After climbing up the first building, you’ll encounter Poppy Bros. Junior. Hold down Y to drop your current Sword ability and inhale Poppy Bros. Junior to get an entirely new copy ability. The older ability will be seen on the ground for a few moments.
Pressing B will now release a bomb that rolls along the ground. It won’t be able to roll up hills, so try using the bomb from atop higher areas or while jumping. Holding down B will reveal a trajectory path to better aim the bombs. Pressing B repeatedly will drop multiple bombs one after the other. You can also push a stationary bomb by walking into it.
At this point, you’ll enter a car shop which seems to be guarded by three Garlfis. Kirby defeats them and then absorbs the rusty old car in the shop with Mouthful Mode. After this short cutscene you can control “Carby” for the first time. A cool trick is pressing A to jump and then B while in the air, rocketing you forward quite quickly while boosted off the ground.
Breaking out of the garage will lead to a road obstacle course. Use the B dash to break through the bridge to get more coins. Enemies can still hurt Carby unless you hit them with a dash. Press Y to spit the car out and you’ll see that you still have the previous bomb ability available. You’ll also notice the car is glowing. Objects that are glowing can be absorbed with Mouthful Mode.
Kirby will then notice enemies taking caged Waddle Dees away. A mysterious character shows up named Elfilin. This creature has huge blue ears and appears to be quite scared. Fans weren’t sure whether this character was good or evil in the initial trailers, but it seems that the enemy has trapped Elfilin against its will. Now Kirby must save him from a gang of Garlfis. You’ll know where they are about to appear due to a sparkly glow.
After saving Elfilin, they will ask about saving the Waddle Dees. Kirby agrees enthusiastically At this point Elfilin begins to follow you around.

Kirby and the Forgotten Land: Wild Mode guide
After beating the first level, players are given the option to switch to Wild Mode. This means that both modes offered the same basic gameplay experience but at different difficulties. At this point, we switched to Wild Mode to take on Downtown Grassland.
How to beat Downtown Grassland
When you arrive on a new level, you don’t bring the copy ability with you. Kirby should quickly absorb a Garlfi. Kirby is able to run around with an enemy in his mouth, meaning you can wait to spit it out until you notice a box or enemy you’d like to damage. The Cutter ability becomes available very early on, however, giving Kirby a long-distance weapon.
The Cutter ability should be used to take down a blue bunny-like enemy that doesn’t yet have a name. It hops up and down, making it harder to target. Getting near an enemy will reveal the Cutter’s close-range melee attack.
Behind the second evil bunny is a button that can be activated with a long-range attack or jumping on it. This will raise a gate to reveal a slice of cake that heals Kirby. Take a left to go through a hidden cave and collect more coins.
You’ll soon encounter a vending machine on the left of the map. Absorb it with Mouthful Mode. As a vending machine, Kirby can jump and also throw soda cans to damage enemies. There are 99 cans available in total. You don’t want to use too many because Kirby needs them to break down a garage door, revealing an abundance of coins and health.
After entering this area, spit out the vending machine and climb the ladder. There is a capsule on the roof. Collect this capsule and head back down to the grassy main path. There will be a giant bull-like enemy that charges up and then rushes towards Kirby. The best way to defeat this huge enemy is to float over him and then use your cutting ability in the air while his back is to you.
Grab the Warp Star after beating the bull to enter a new area. Make life easier by using either the Bomb or Cutter ability to break the boxes underneath each cannon. This will drop the cannons into a ditch, and the bombs no longer able to reach you as you collect coins.
After collecting the coins, absorb a glowing cone to become Cone Mouth. Pressing A will jump while B will drill the pointy part of the cone into the ground. This can damage enemies or break certain objects. The attack has a decent range so you don’t have to be right on top of enemies to attack them with it. When you see a crack in the ground, use B to break it to reveal more coins and health.
Keep in mind that there is a short delay after Kirby uses B. This leaves him vulnerable to incoming enemies who can charge him before you can press B again. After encountering another bull, you’ll see a porch with a tulip on it. Use Kirby’s B attack to make the tulip bloom.
Waddle a bit further and you’ll see a leaky pipe. Use Kirby’s B again to break the pipe further. A burst of water will gush out, allowing Kirby to be elevated to an entirely new area. Diving off of the high area onto the stacked up boxes with B will reveal another capsule.
At this point, spit out the cone and climb the ladder. A Waddle Dee in a cage will be up there begging for help. Select the Cutter or Bomb ability. Stepping forward will active a boss fight. Face Wild Edge, an updated version of Gigantic Edge, by finding ways to attack him from behind since he has a shield and only charges up forward-facing attacks. He will be left vulnerable after attacking, giving you time to attack.

A Warp Star will lead you to a new area. Here, you’ll encounter another giant bull. Defeat it and climb up the ladder to find a huge orb. Use Mouthful Mode to absorb it, then mash different directions to open it up. It will reveal a Waddle Dee that needs saving, the second “hidden Waddle Dee” you need to find.
When you jump back down, you’ll see a turtle-like creature that can’t be damaged by any of your attacks as it snaps at you. Climb up a building you see on the left, absorb the Sword ability at the top, and then use it to cut a vine that’s holding a cone. The cone will drop and you can absorb it with Mouthful Mode. Use the B attack to break the turtle’s protective outer shell.
Release the cone and climb up the building in front of you with an arrow nearby. Halfway up there will be another bull. Goad it to run at you to reveal the tulip behind it. Absorb the cone you see shortly after and use B to break another pipe. Go up the water to encounter a bigger version of the snapping turtle enemy.
Escape the turtle’s powerful bite by hiding in holes on the roof. A crack in the ground reveals another hole if you press B, giving you a lot of food to use in increasing your health. Walk forward and hide behind a leaky pipe. The turtle will be goaded into biting it. Then press B to make another water burst, using it to reach a safe high-up position.
After grabbing another capsule, drop down and press B to break the protective cement shell of the evil turtle. This reveals three Waddle Dee that need saving. At this point the stage is cleared!
How to beat Brawl at the Mall
At this point an ominous new level appears with a hidden enemy. You can choose to do either Spring-Breeze or Wild Mode. Exploring the area reveals a creepy abandoned mall. Go up the broken escalator and then take a right to find three abilities: Bomb, Sword, and Ice.
As you skate around, you’ll see a giant ape watching you from outside. He breaks the glass and grabs Kirby, forcing you to fight. It’s Gorimondo!
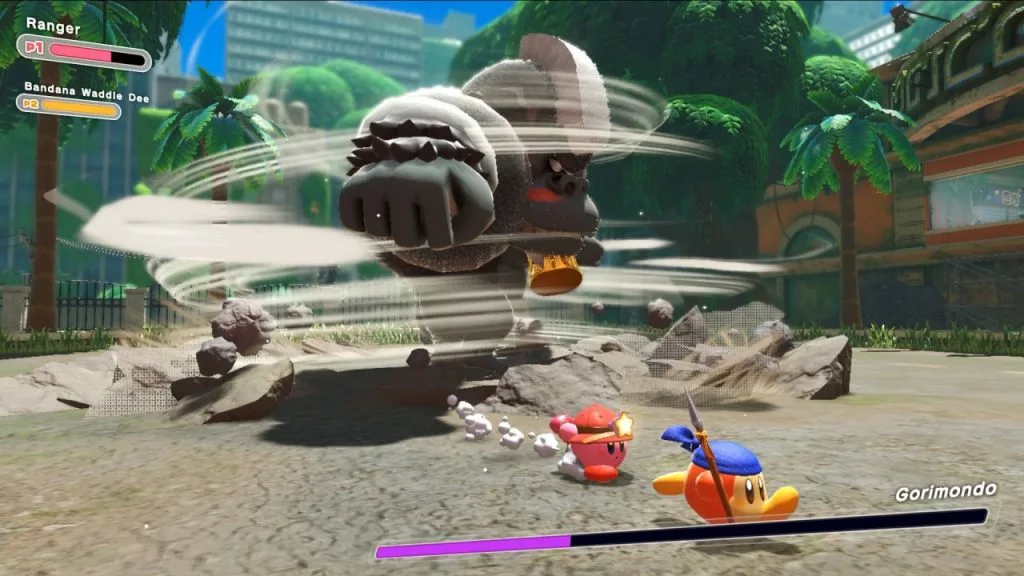
The best way to defeat Gorimondo is to get very close to him. He likes to swipe his arms out, but you can avoid these attacks by being right beneath him. Watch out for his stomping fits that damage you and sends out a powerful wave. When he spins, try staying afloat to avoid the ground damage.
Olivia has worked in media ever since graduating from college, with her coverage ranging from traditional newspaper reporting to digital coverage of all things gaming, online betting, and nerd culture. She has traveled around the world pursuing that coverage, from the far coasts of the United States to the busy downtown core of Tokyo, Japan. Olivia’s favorite games include Overwatch and Super Smash Smash Bros, and she has been published at Esports Illustrated, Inven Global, EsportsInsider, Upcomer, and elsewhere.
View full profileRead Also
 News
News
 Twitch
 News
News
 Slots
Slots
 League of Legends
 GTA
GTA
 Twitch