Understanding differences between aim training maps in KovaaK 2.0


Shooting bots isn’t enough to sharpen up your aim. But, if you’re still whiffing shots after spending hours in KovaaK, you may want to understand your aim training routine and revise your warmup maps.
Whether you play Counter-Strike: Global Offensive or Valorant, these FPS games require razor-sharp aim, reaction time, awareness, and more. These skills can be honed up in practice ranges like KovaaK 2.0. However, a thorough understanding of the practice routine is a must to impact the game.
Jumping into KovaaK and running random maps may not help in practice, so it’s crucial to pick a routine that improves your weak areas. Observe your in-game demo and find out where you lack. Whether it’s your aim placement, reaction time, the movement that is holding you back. Pick your ideal aiming training routine based on this information.
Most FPS players resort to good old bot shooting methods to warm up pre-game. While it may help old-time players who have mastered the art of FPS, new players may need to understand that not all maps would help.
To practice shooting an enemy behind a wall, you need a scenario that includes a solid object for you to peek through. To deal with Valorant’s run and gun problem, moving and jumping targets are crucial to improving in-game performance. Based on their weak areas, players should try these aim training maps in KovaaK.
Reaction time
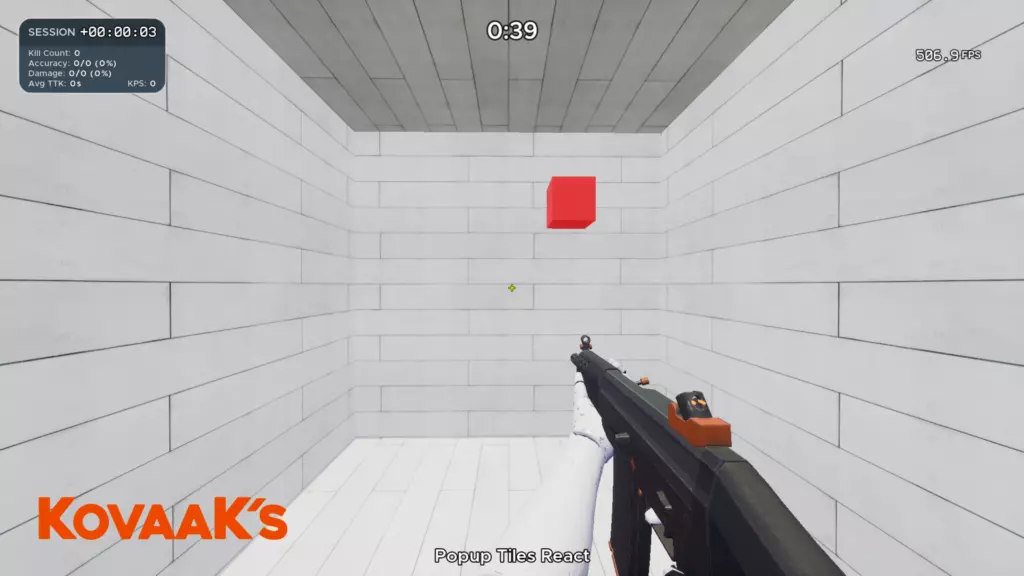
If you find yourself dying before you could even shoot your shot, it’s likely because you have a slow reaction time. Shooting stationary objects won’t help with this problem. For this, try Pop-up Tiles React. The red squares quickly disappear from the screen after popping up for a second, forcing you to shoot faster.
Target switching
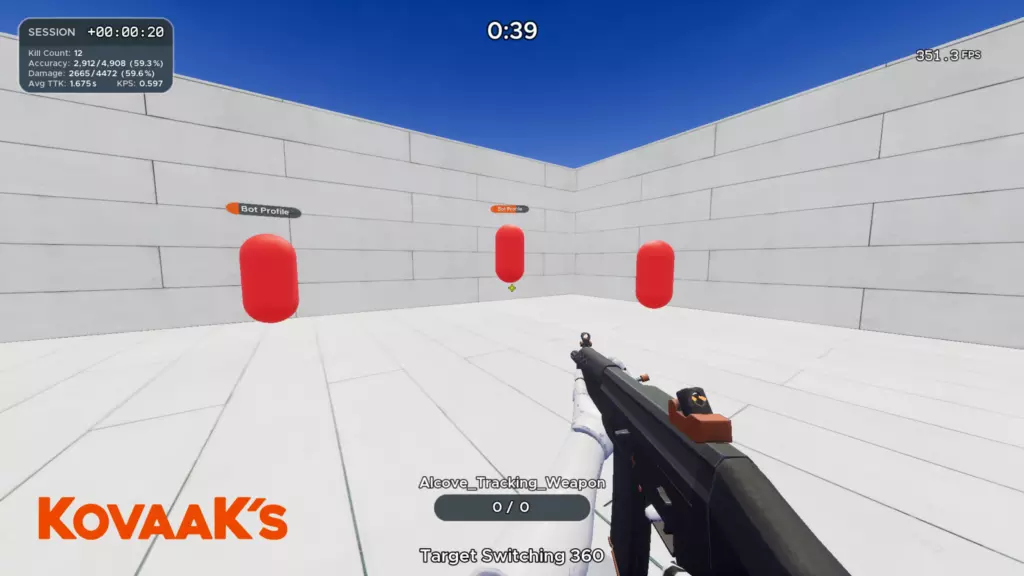
If you find yourself dead after getting one kill, you may want to stop using the in-game practice range. Enemies often ambush in groups, and it’s essential to know when to switch crosshair and where to place it. This is called target switching, and basic aim training maps can’t improve it. Use Target Switching 360 static to annihilate multiple enemies when they try to ambush you.
Shooting moving targets
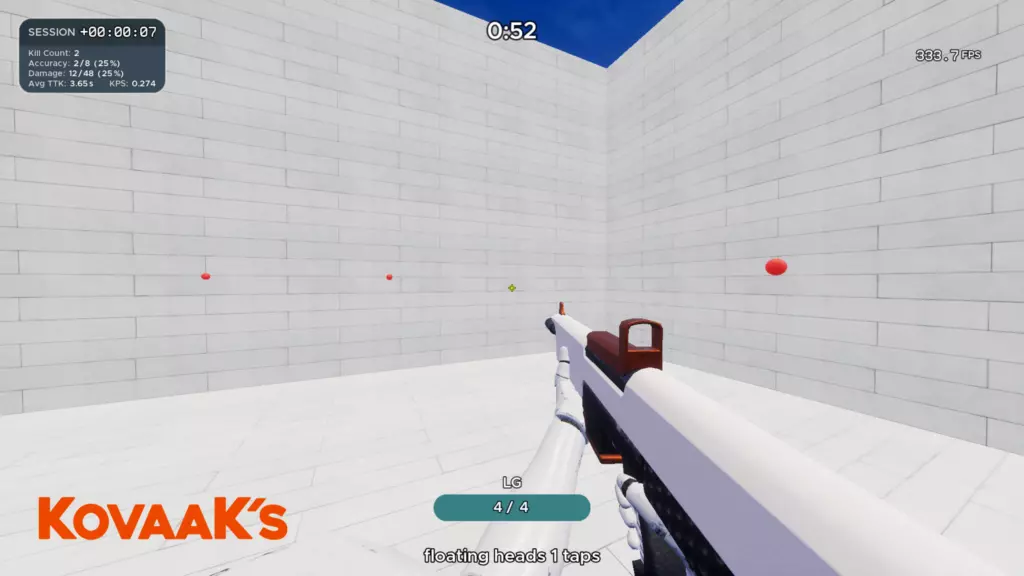
If you were an “aim god” in CSGO but found yourself flopping in Valorant, it’s likely due to the slight difference between the movement mechanics of both games. Running and gunning is common in Valorant, so it’s essential to stop shooting stationary targets. When practicing for Valorant, use floating heads 1 tap to form an ability to hit moving targets.
180 Flicks
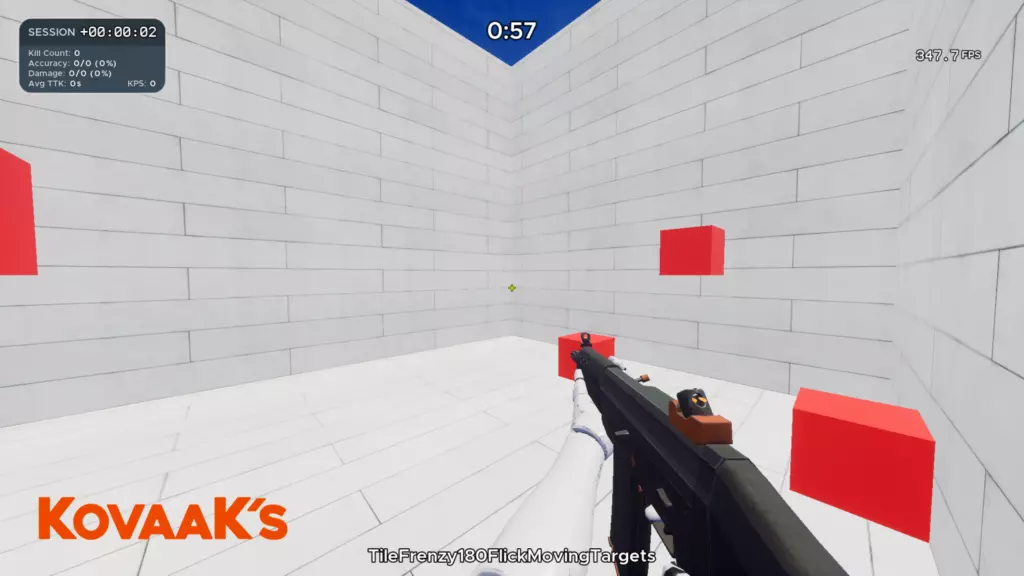
It’s different shooting a moving object and entirely different to land a 180 Flick. The 180 flicks may not come in use when you play CSGO, but they become necessary in Valorant due to agents like Jett and Raze. Maps like floating heads might not help with quickly shooting a flying Raze. Try TileFrenzy180Flick to master highlight-worthy shots.
Peek training
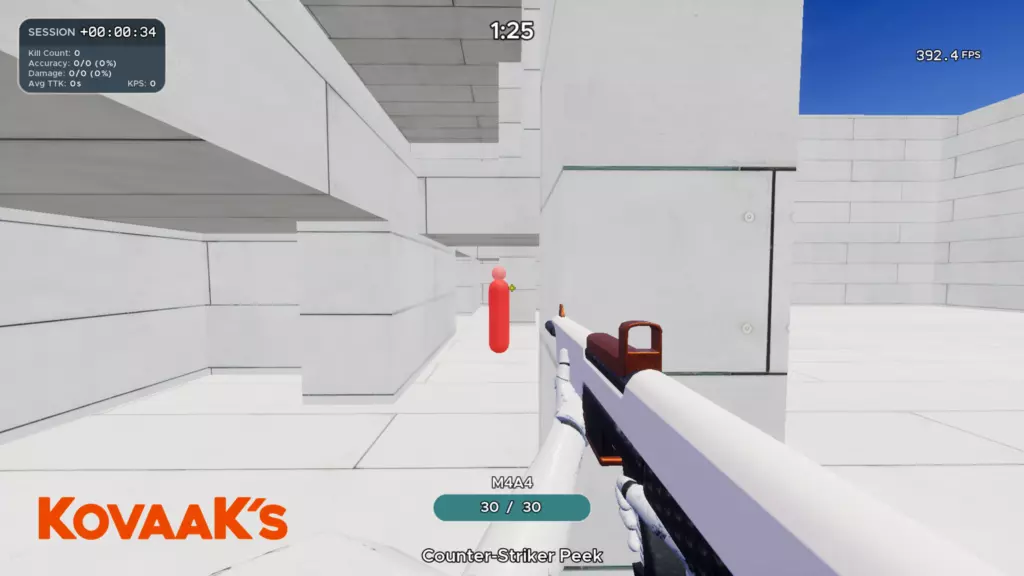
Valorant may have paper walls, but CSGO requires dangerous wall peeking to land a kill. Shoulder-peeking is a common mechanic in CSGO, but it’s tough to master. While shooting moving targets will help solve the run-and-gun problem, it won’t impact your model movement. For a smooth “Ferrari peak,” try Counter-Strike Peek or Pole Peeker in KovaaK.
You may combine all these with in-game practice range as your regular aim training routine or come back to these maps at least once a week. Find all the challenges on KovaaK’s 2.0.
Fariha Bhatti is a long-time gaming writer who loves competitive FPS games and slots with particularly fun themes. She got her start playing classic games developed by SNK, from legendary fighting game series The King of Fighters to challenging platform franchise Metal Slug. She now spends most of her time playing Valorant and Counter-Strike 2 while working her way through new slot releases to find her next favorite. Fariha has been published at PCGamesN, TalkEsport and ONE Esports.
View full profileRead Also
 Esports Betting
 Counter-Strike
 Esports Betting
 Counter-Strike
 Counter-Strike
 Counter-Strike
 Counter-Strike