GTFO Mine Layer, C-Foam, and sentry tools explained

There are eight tools to pick from in GTFO, and each one can take several missions to fully master.
Experienced GTFO players know that many missions are decided by the efficient use of tools. The equipment category is the least flashy of the four options, but there’s no questioning their power in the hands of a skilled user. All four of the main categories cover different jobs, and in harmony, they can make even the most difficult levels possible.
If you’re just getting into GTFO thanks to the release of ALT://Rundown 5, here’s each tool explained and everything you need to know to use them effectively.
A good Mine Layer is the difference between death and victory
While the Mine Layer may seem like the most straightforward tool to use in GTFO, it also has the highest potential of screwing over both you and your team. These explosives can turn hordes of angry Sleepers into ground meat if used properly, but one wrong decision can down an entire squad in the process. Learning to use the Mine Layer can be a costly affair, but these tips can help you get started without the painful trial and error.
The Mine Layer’s primary use is to blow up hordes of enemies as soon as they break down a door. To do this, simply drop a mine with the laser facing the center of the door and wait for a horde to develop. As the Sleepers bang on the door, they will also pile up in a neat little line. Once it drops, all it takes is for an enemy to step into the laser detector, and they will all die in one swoop.
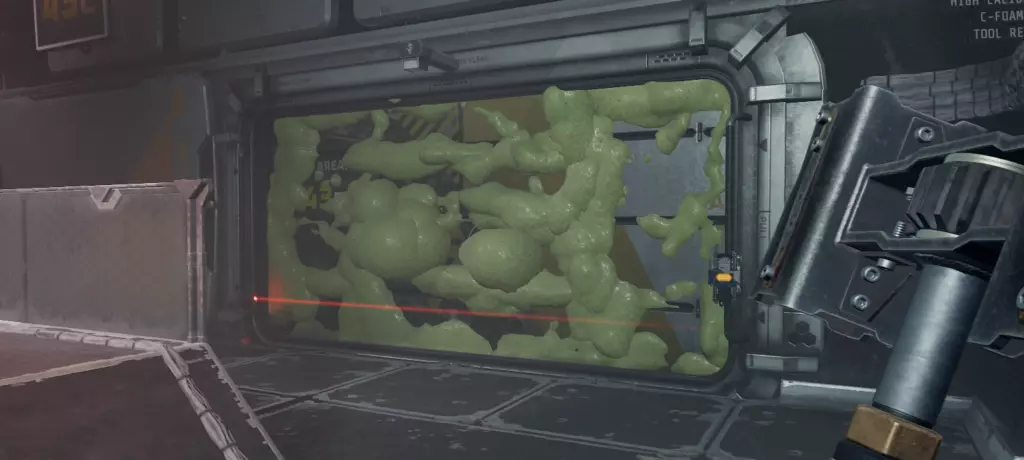
The placement of the mines is the most important factor determining your success in this endeavor. For wide doors, your best bet is placing them on the side of the doorway on the little lip in front of the metal. Make sure to place it as far from the door as possible, as the burst door model can sometimes get in the way and block the laser.
For smaller doors, the hitbox of the mine can make it more efficient to place it perpendicular to the entrance. Try to find a piece of the environment that faces towards and door and place the mine there. It’s best to get it facing directly in, but a slight angle can usually work just as well. Anything beyond about 30 degrees will miss a good chunk of the horde, wasting most of the mine’s potential.
The Mine Layer can also pick up deployed mines before they go off, so when prepping for a hold, feel free to put one on every door and simply collect the ones that went unused.
The Mine Layer’s interaction with doors gives it a ton of synergy with other tools. Pair it with a C-Foam Launcher or grenade to hold back a horde and blast it to smithereens once it finally breaks through. Sentries can stagger enemy swarms, eventually lining them up for a giant explosion that wipes them all out at once. A player using the Bio Tracker can call out a Scout’s movement pattern, allowing a single mine to deal with them very cleanly. Make sure to coordinate with your team to use the tool to its fullest potential.
If there is no door to work with, such as in rooms just beyond security scans, it’s still possible to make limited use of the Mine Layer. Place mines higher up so they are only activated by larger units like Giants. This will destroy their heads and put them on death’s door before they can approach your group.
We wouldn’t recommend placing them in random corridors, as unpredictable bioscans could put you or a teammate uncomfortably close to them. Be sure to use any spares to create a light show at the end of a peaceful extraction.
C-Foam is the hardest GTFO tool to master
Along with the Bio Tracker, C-Foam is probably the least exciting option for tools in GTFO. It doesn’t make enemies explode or help cut down an incoming horde but never underestimate the power of a clogged-up door. In skilled hands, the C-Foam Launcher is the difference between a successful terminal uplink and being swarmed by dozens of Sleepers during a critical moment.
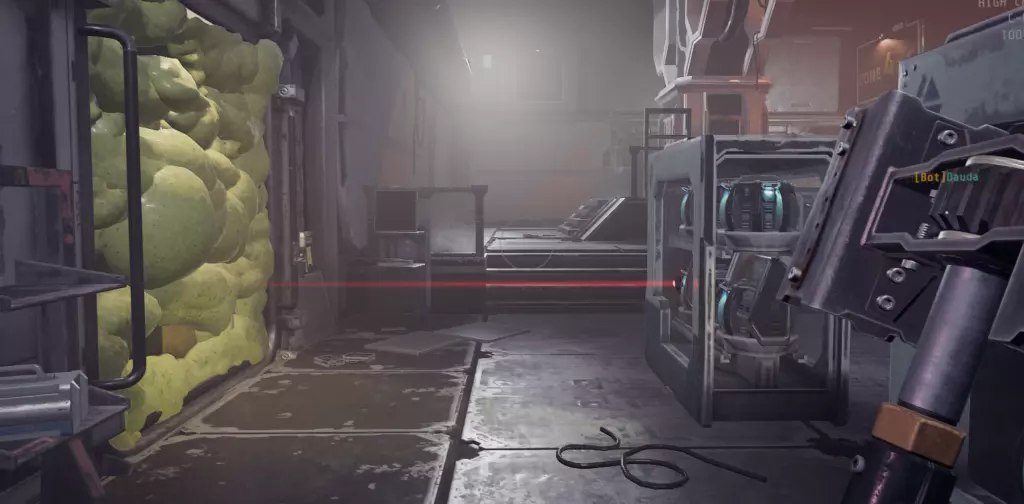
The C-Foam Launcher’s primary use is indeed reinforcing doors, and that’s where it truly shines. After a short charge, C-Foam can be used to add additional health to a closed door. This allows the horde to bunch up in one location, which allows a single mine to blow them all away and mostly kill larger units like Hybrids or Giants.
It takes exactly 17% to fully reinforce a door, which will play a special animation to show it’s been saturated. A full charge actually consumes 20% of the total ammo, so stopping slightly short of the full charge will allow the user to be more efficient. This means that a skilled C-Foamer can get as much use out of 85% ammo as a newbie can with 100%. This adds up a lot over the course of a level, so try to conserve your ammo as often as you can.
To truly master the C-Foam Launcher, it’s also important to understand enemy spawn locations. Sleepers always take the path with the least amount of doors and distance, so check your map and try to guess where they’ll come from. If you’re not sure, try C-Foaming two doors halfway and then run to the active one during a scan and fully reinforce it. Enemies tend to take the same path on repeats of any given level, so sometimes failure is the only true path to mastering one of the most complex tools in GTFO.
In certain situations, C-Foam can also be used to freeze sleeping units. This is especially useful for bigger enemies like Hybrids when they’re surrounded by smaller Sleepers. In such cases, be sure to aim the C-Foam at their feet rather than on their body. Both methods work, but aiming for the floor was much more consistent in our testing. Finally, C-Foam can be used to freeze Scouts in their path, but this method relies on the Scout actually walking through the C-Foam patch.
What’s the difference between GTFO sentry guns?
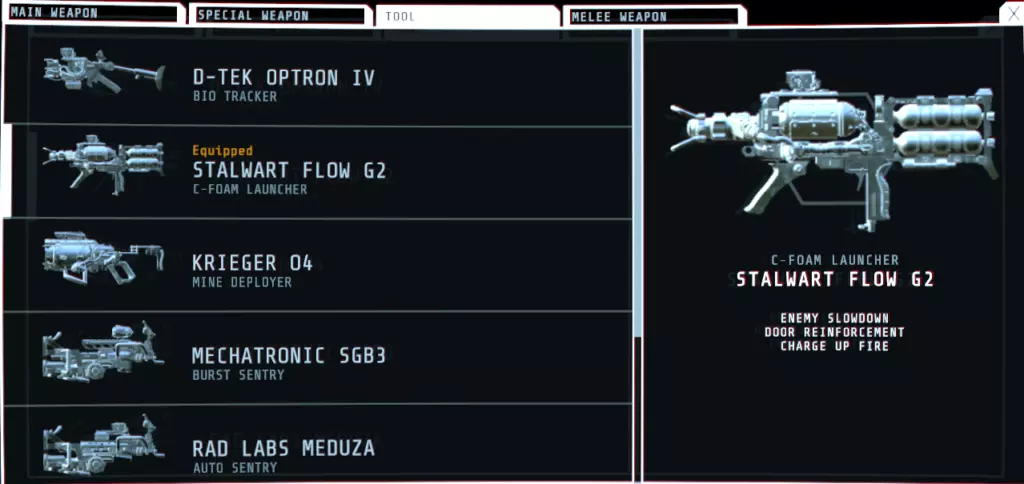
The sentries make up more than half of GTFO’s tool options, and they’re also the ones that new players gravitate towards. They’re fairly self-explanatory, and they work just like most gamers would expect. You plant them down, they consume ammunition, and they thin hordes before players have to get their hands dirty. However, not all sentries are equal, and the best choice varies wildly depending on mission type, equipped weapons, and enemy variety.
First up is the Burst Sentry, which is also the easiest to understand. This one works just like most sentries in other video games. You plant it down facing a direction, and it will automatically target and shoot enemies that it sees. The Burst Sentry specializes in thinning out waves of enemies, as each burst is likely to kill one Sleeper or at least heavily damage it. They’re also good at holding chokes all by themselves since they deal with the threat directly. If you’re not sure which sentry to take on a blind mission, burst is a great default choice.
The Auto Sentry, however, works a little differently than players may expect. This option isn’t nearly as good at actually killing enemies, but it excels at slowing down hordes by staggering them. When staggered, enemies enter an animation where they’re unable to walk forward. This makes them easy pickings for players wielding high-damage weapons like the High Caliber Pistol or Heavy Assault Rifle. Use Auto Sentries in combination with your guns to lock down a chokepoint all by yourself.
The Shotgun Sentry is the first of the specialized sentry tools in GTFO. This works as players would expect shotguns to work, dealing heavy damage at close range and staggering Giants, Hybrids, and Big Shooters. However, its effectiveness drastically decreases based on range. To compensate, set it up right around corners where enemies must be close to activating it. If set up properly, the Shotgun Sentry can blast away Sleeper after Sleeper without requiring the player to shoot a single bullet.
Sniper Sentries are effectively the opposite of Shotgun Sentries. They’re precise, designed to take down one target with each shot. They have a larger acquisition range and are best for dealing with larger enemies. In exchange, they have much lower total ammo than the other choices. Sniper Sentries also have the added benefit of being able to kill Scouts in one shot with perfect accuracy. Just make sure there are no other enemies in the targeting cone before you set it up.
The Sniper and Shotgun Sentries also have the added bonus of Bio Tracker Symbiosis. This mechanic buffs both specialized sentries by improving their target accuracy and ammo efficiency. In the case of the former, it speeds up their detection and all but guarantees that the shots will find their target. In the case of the latter, the game appears to cheat, sometimes giving the guns free shots. Bio Tracker Symbiosis is a strange mechanic, but for particularly intense mission types like reactor startups or timed survival, it can help eke out that little extra bit of needed efficiency.
With all sentries, it’s important to keep a few general tips in mind. Each sentry can be refilled while it is deployed. A sentry’s current ammo count is displayed on a rear screen, so learn each one’s total ammo count to prevent accidentally wasting tool refill packs. Sentries have an acquisition range of around 90 degrees, so you can set them up to cover multiple angles. Lastly, sentries do not target players in their path, but they can deal friendly fire to anyone in their firing cone if activated by enemies.
The Bio Tracker is one of the best tools for hard GTFO levels
The humble Bio Tracker rounds out the list of GTFO tools. This is probably the least exciting tool to use, as it is rarely necessary to bring for most levels. It’s also less flashy than even the C-Foam Launcher. However, the Bio Tracker is universally useful across all levels and downright necessary in others. Learning how to master its use can make the difference between a clean extraction and running into nasty surprises when you least expect them.
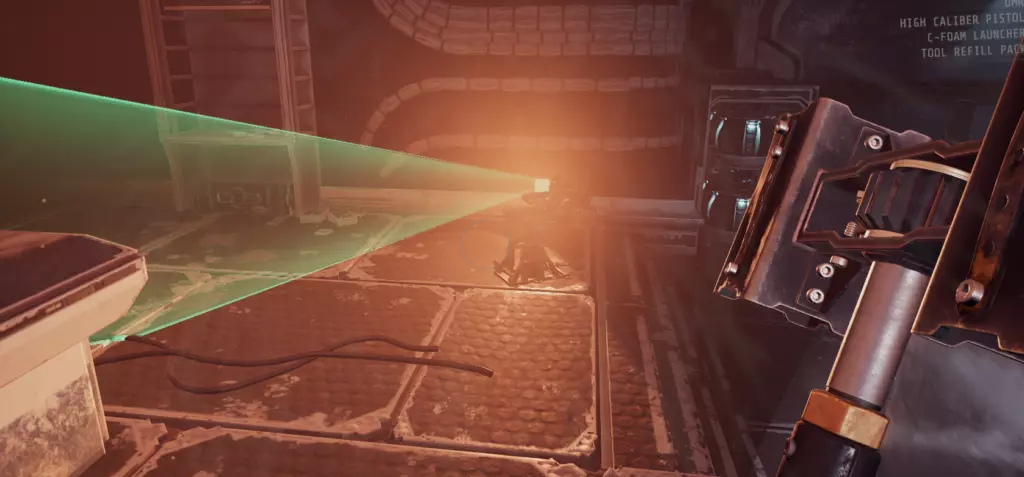
In its simplest form, the GTFO Bio Tracker is meant to help players deal with stealth encounters. It can be used to locate all of the sleeping enemies in a room, and the holder can then relay that information to allies to make quick work of them. Calling out pairs or triplets can make dealing with them much easier. The Bio Tracker also works through walls, allowing you to get a sneak peek of the rooms ahead. Just remember that you can’t tell the height of enemies with the tracker, so it becomes less useful in vertical rooms.
![]()
In addition, the Bio Tracker can be used to ping out moving targets for everyone to see at all times, even through walls. This is extremely useful for dealing with Scouts, as players can use the ping to either stay away from them or ambush them around corners with melee weapons. When the hordes do come, the Bio Tracker can tag all the individual enemies. This is especially useful in dark and foggy environments, which are both extremely common in GTFO.
While useful in those scenarios, there are times when the Bio Tracker becomes hands-down the most necessary of all tools in GTFO. That case is when dealing with awakened Shadows. The invisible enemies are a pain to deal with, as even sentry guns won’t be able to detect them. Bio Tracking them is the only way to get a visual of them from a distance. Combine the pings with flashlights to get a decent view up close and take on the game’s most annoying enemies with confidence.
Read Also
 Kick
Kick
 News
News
 Twitch
 News
News
 Twitch
 Slots
Slots
 Big Wins