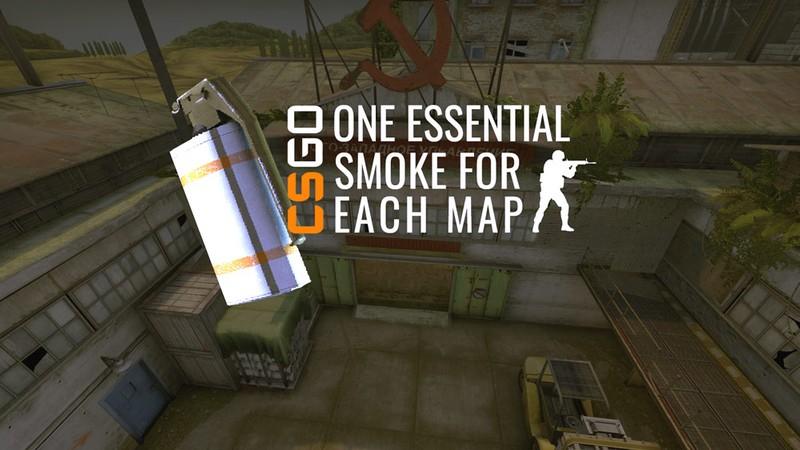
One key smoke on every map that all CSGO players need to know
There are few things more important than utility when it comes to winning a game of Counter-Strike: Global Offensive.
There’s nothing worse than getting only silence in return when you ask your matchmaking team if anyone knows any smokes. The problem can be even worse when third-party platforms offer better servers than Valve’s at attractive rates for free players and subscribers. There, the hardcore Counter-Strike Community meets the casual, and the results aren’t always pretty.
This guide offers a quick overview of some popular smokes, and we’ve mixed in some of the less common smokes as well. By making sure that you know just a lone key smoke on each map, you’ll never be caught with a smoke in your hand without any use for it.
All of these smokes are specific to the tickrate of the server; in this case, we’ve compiled a list of smokes that work on 128 tick servers. Both ESEA and FACEIT provide servers that run at this rate, so these smokes will work on those third-party clients.
Mirage window from top mid gives plenty of options
Everyone already knows this smoke, of course, but it’s not pointless to showcase it again. Somehow all players have managed to mess this one up at least once.
The throw isn’t hard. Stick yourself in the first corner and left-click. This smoke gets mixed up with the window Molotov that requires a flatter arc and a run-throw to land from the same position.
Mid control is the most important avenue to a win on Mirage. With the addition of the self boost from bottom mid to wnipers, this smoke is now ten times more powerful. The attackers can use three smokes to block off all entrances to mid, forcing CTs to hold or rotate depending on the timing of the smokes. This still leaves two attackers with smokes to take and hold a site for the plant.
The easy CSGO Cache Z Smoke from outside A main
Even with changes to CSGO’s Cache and the addition of the mid window, the Z smoke is still an important part of the map’s utility arsenal. After throwing this smoke, players can follow up with a flashbang without moving positions or their crosshair to flash the mid player off both window and white box.
Head towards A main, but line up at the corner heading to squeaky. Aim at the bullet hole in the center of the A spraypaint and jumpthrow. Again, a flash thrown from the same spot and angle with hit both white box and window at full power.
The smoke gives the Ts the ability to only have to watch two angles from window and white box, and the T AWPer can then peek and hold window for the CT response.
Here, the A players are scared of a mid to A split, and the T concentration on middle should draw either a peak or a retreat from the player closest to highway. Alternatively, a quick highway flash can send a T inside the smoke and through Z to catch rotations in either direction.
How to smoke heaven on CSGO’s Overpass
The B rush is an Overpass staple, but the classic strategy is often stopped dead by an AWPer in heaven. As long as the Ts have a player in connector to watch their back, this heaven smoke is a seriously easy way to increase the odds that the play works out.
Head to construction and wedge yourself right in against the wall and the B site sign. Aim at the second nub on the lamp post and left-click.
The great thing about this smoke is that it lands so far deep inside heaven that a walk out by the defender is impossible without being spotted by attackers. The connector and the thrower can then agress and molotov barrels while the rest of the team takes monster.
Nuke heaven smoke from T roof
Nuke is rough enough as it is on the T side, but this smoke makes the normally painful A take a little easier on the attacking side. From spawn, make your way to T roof. Be sure to shoot out the glass from the left side windows on the roof of the building. Alternatively, you can toss a grenade in that direction to break them once you’re in position. Then, hop up on the silo pipe, positioning yourself over the seam and find your aim as shown below.
There are two ways to make sure you’re aiming in the correct spot. Either use the verticle railing and move one vertical siding space to the left or follow the ending of the blue paint on the building behind the railing down until you’re aiming at the middle of the small pipe. Once there, it’s a quick left-click throw.
This smoke is tricky to get correct consistently, but after around ten to fifteen attempts without pause it should prove doable. The advantage here is that the thrower can then either wrap outside off silo to mini or back down the ladder to secure the ramp flank. The smoke also works well for vent dives, preventing a proper Molotov lineup without exposing the thrower.
Vertigo’s simple smoke makes B site much easier to take
Vertigo is a fantastic map once players get used to it, and it functions as a vertical Cache, with opportunities all over for CT aggression. With this smoke, you can cut off one source of that threat by making at CT jumping through boost think twice about whether that’s a good idea.
The smoke covers the mid to B boost, meaning that either the CT will land and stay in the smoke, prime for a blind spray or drop, making them an easy target. It’s easy to throw, but the setup is a little tricky, so we suggest a few practice rounds before players use it in officials.
Move towards the B site from T spawn and right inside the hallway entrance, there is a small, dotted circle on the floor. Crouch, look up at the second orange circle in the window and aim there. Finally, crouch throw, flash, and take the site.
This smoke makes any mid defender nervous. For all they know, this is a B hit, a mid hit, or a “someone is totally in that smoke and I have to fall back” hit. Any of those are good options for the aggressor. No one wants to jump through a smoke, and causing a mid player to commit to a site opens opportunities for the Ts.
Options are king on the T side, and this is what this smoke gives you.
How to throw the classic mid smoke on Train
Out of all the maps, we’ve found that people often don’t know smokes for Train. It’s a difficult map to play CT side, and most take it out of the rotation. That said, this is still a fun map to play while requiring an understanding of how the map works.
Players should learn the mid smoke, a smoke that blocks off the center lane coming out of T connector. It pops fast, allowing for quick flash takes of the A site while exerting pressuring Ivy.
Line up and put your nose on the building in the first picture, aim at the corner by the sun and left-click.
The smoke gives the Ts a little more room to play with when coming out of the T connector, which is always a good thing. It also forces players to either climb the ladders, making them more susceptible to flashes thrown from outer.
The smoke is also great for a lurk or early fake, as the thrower can literally go anywhere: ladder, lane, sandwich, T con, brown halls. It’s the best psychological smoke in Counter-Strike, bar none.
Dust 2’s mid to B smoke isn’t just for B site
The most versatile smoke in Counter-Strike: Glo0bal Offensive is mid to B smoke on Dust 2. It allows the attacking team five total entrances to two different sites by removing the ability for the defending forces to rotate through CT. At its most basic, the smoke is used to isolate the mid player from A, either forcing them to retreat into CT, the B bombsite, or B Door.
Combined with one or two flashes, this smoke alone is enough to win some matchmaking games. The smoke isn’t perfect as it takes two smokes to cover the passageway, but it’s enough to allow the Ts to take middle control resmoke on their way to be.
Move behind x-box and look up for a small spot on the wall. A simple left click throw will land the smoke almost dead center of the entrance to CT.
Dust 2 is a map that heavily emphasizes aim, and the mid to B smoke allows Ts to take away that aim star opportunity from anyone rotating back through long to cover the mid take. Learn it, use it, and profit from it. It’s also a great fake. Smoke for the mid to B but take catwalk control instead while the CT’s panic and overrotate.
Throwing A site’s default smoke will keep you alive on Inferno
Finally, inferno’s A bombsite is hard enough to hold in a matchmaking game. With three main angles, a solid T hit can crack it wide open. This smoke will make it even harder for the CT team to hold A site by blocking off the cross angle from library and giving the Ts cover to plant. Near the told of mid, find the lattice attached to the walk get in tight. Turn around and aim a little right of the first visible antenna and left-click.
The smoke isn’t as versatile as the moto smoke but creates a smaller area that attackers coming up lane have to worry about. Be mindful of both the corner box and default box boosts and a plan should be easy. Teams will be unable to clear site with this smoke, so players should be cautious once it fades.
Knowing just one smoke on each map is where everyone needs to start, and these are just a few of the many available. Counter-Strike is all about utility and brains, and learning to use them effectively is an important step in mastering Valve’s first-person shooter.
Recommended

All maps are now available in CS2, what does it mean?
Poor Inferno players.
Redline creator reveals a sequel skin for CS2
Maybe call it the Orangeline?
CS2 release date: Everything we know so far
Is it CS2-morrow? No, it is not.

