

How to set up Discord permissions and create a private channel
Discord’s permissions systems can be pretty confusing. Some permissions can override others, so it’s an important thing to get right. Let’s walk through the way Discord assigns permissions to each user group, and how a server owner can change them to create a private channel for special members.
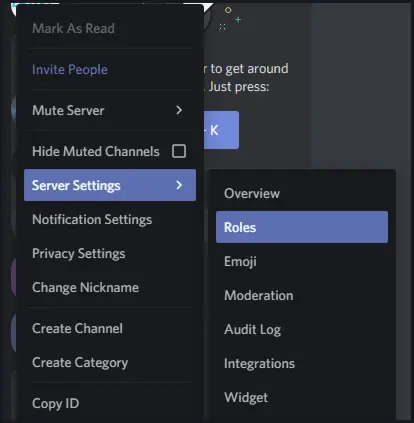
To set up Discord permissions, users have to get to the role menu. The menu can be found by right clicking the server and selecting “Server Settings” and then “Roles.” All servers start with the “@everyone” and “Owner” roles. setting up the @everyone role is a big part server management, and its the most important step to get right.
Setting up Discord’s @everyone and role permissions
This is important because the @everyone role sets up basic permissions for any user that joins the server, defining what they can do or access before an owner can assign them role. Think of the @everyone role as a foundation that server owners can then build on with more specific roles and server settings.
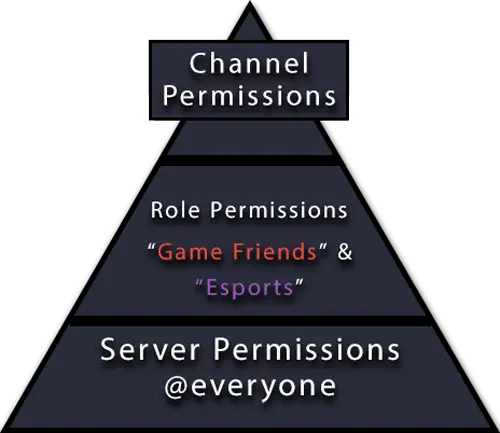
Below is the Discord triangle, and it shows which permissions overwrite one another. At the base of the triangle we have server-wide settings and roles, such as “@everyone.” Above that are roles, catagories that override the base settings found in the “@everyone” role by adding new permissions. Finally, Discord has channel permissions. These allow server owners to restrict access to certain channels or groups of channels.
By changing the permissions for “@everyone,” users can set the basic permissions for anyone who joins the server and any roles they create afterward. Here are Discord’s default permissions for the “@everyone” role, meaning that these are the things users can do as soon as they join a Discord server.
Default Text Permissions
- View channels
- Create invite
- Change nickname
- Send messages
- Embed links
- Add reactions
- Use external emojis
- Mention “@everyone,” “@here,” and all roles
- Read message history
Default Voice Permissions
- Connect
- Speak
- Stream video
- Use voice activity
Since these permissions apply to users who don’t have a set role, users may want to turn off “Create Invite” for more control over who has access to their server. We’ve gone ahead and turned off the ability for the “@everyone” roll to create invites because we’re going to let the new roles we make handle inviting new users.
Some users will stop here. If you just need a simple server and don’t want to bother assigning different roles to friends, you can set permissions for every server member through “@everyone.” Server owners will always have full permissions.
Customizing roles and permissions on Discord
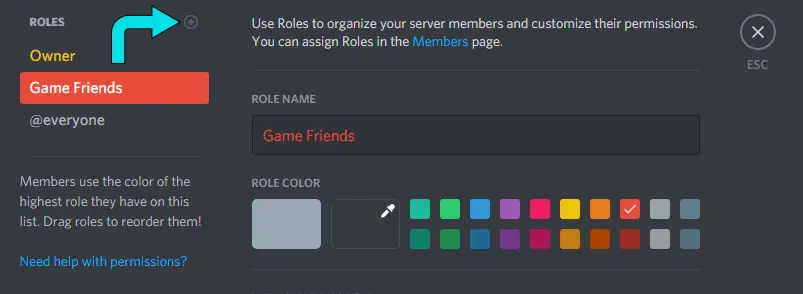
But if a user wants to customize their server, they’ll have to create a new role. That’s done through the same menu by clicking on the plus sign. Since we already set channels for Gameplay and Esports in our tutorial on how to set up a basic Discord server, let’s make a category for each to show how Discord’s permissions system works.
Game Friends is our first role, and we’ll use this role for members that we don’t want to have full permissions, but still be able to invite new users to the server.
When you make a new role, Discord automatically copies the permissions from @everyone as a starting point. That’s why setting the @everyone roles is so important. It defines the basic Discord abilities that all server members have.
From there, it’s easy to add permissions to a new role. New server roles also come with two new options. “Display role members separately from others” and “Allow anyone to @mention this role” create Discord’s colored categories on the right side and let users mention anyone in these roles from the server’s text channels.
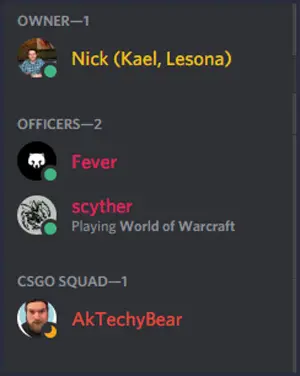
Here’s an example from a different server. In this server, two players have a different role than everyone else, so they’re shown in their own section called “Officers,” while another member is part of the CSGO role.
We’ve also created a second role called “Esports” and set it up with the same permissions as “Game Friends.” This can be used to keep the same permissions across multiple roles while still separating users into different categories. But the real power of Discord’s roles are creating private channels can only be accessed by players with a certain role.
How to make a private Discord channel, the easy way
Up until now, we’ve been changing permissions on a server-wide basis. That means that any changes we’ve made in the “Server Roles” menu applies to all channels in the server. What we want to do now is change the server settings so that only members in the “Esports” role can join the Esports section. This is useful for things like Officer Chat in guilds, or planning a team’s strategy for an upcoming event or tournament. Whatever the reason, creating a private group of channels is a simple process, especially after Discord streamlined the process in a recent update.
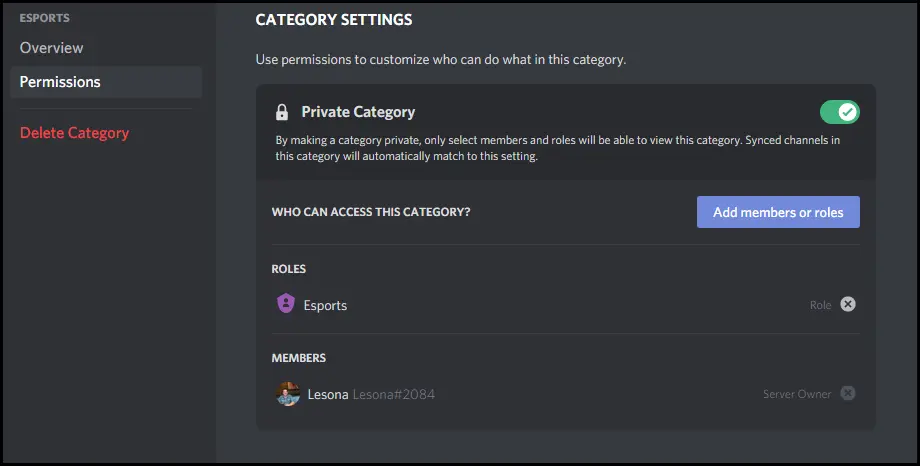
Since we’ve already made a separate group of channels, all owners have to do is right click the group, select “Edit Category,” click “Permissions,” and then toggle the switch for “Private Category.” Select a role to have access to the category, and that’s it.
Setting up a private channel used to be a complicated mess of allowing and disallowing permissions for all roles on the server. Now, it takes less than a minute to do. Discord’s improvements have made it fairly simple to rearrange and change servers to fit a user’s needs.


Recommended
GeoGuessr World Cup 2024 — Is Rainbolt competing?
As one of the most popular GeoGuessr players, will we see Rainbolt on the international stage?
...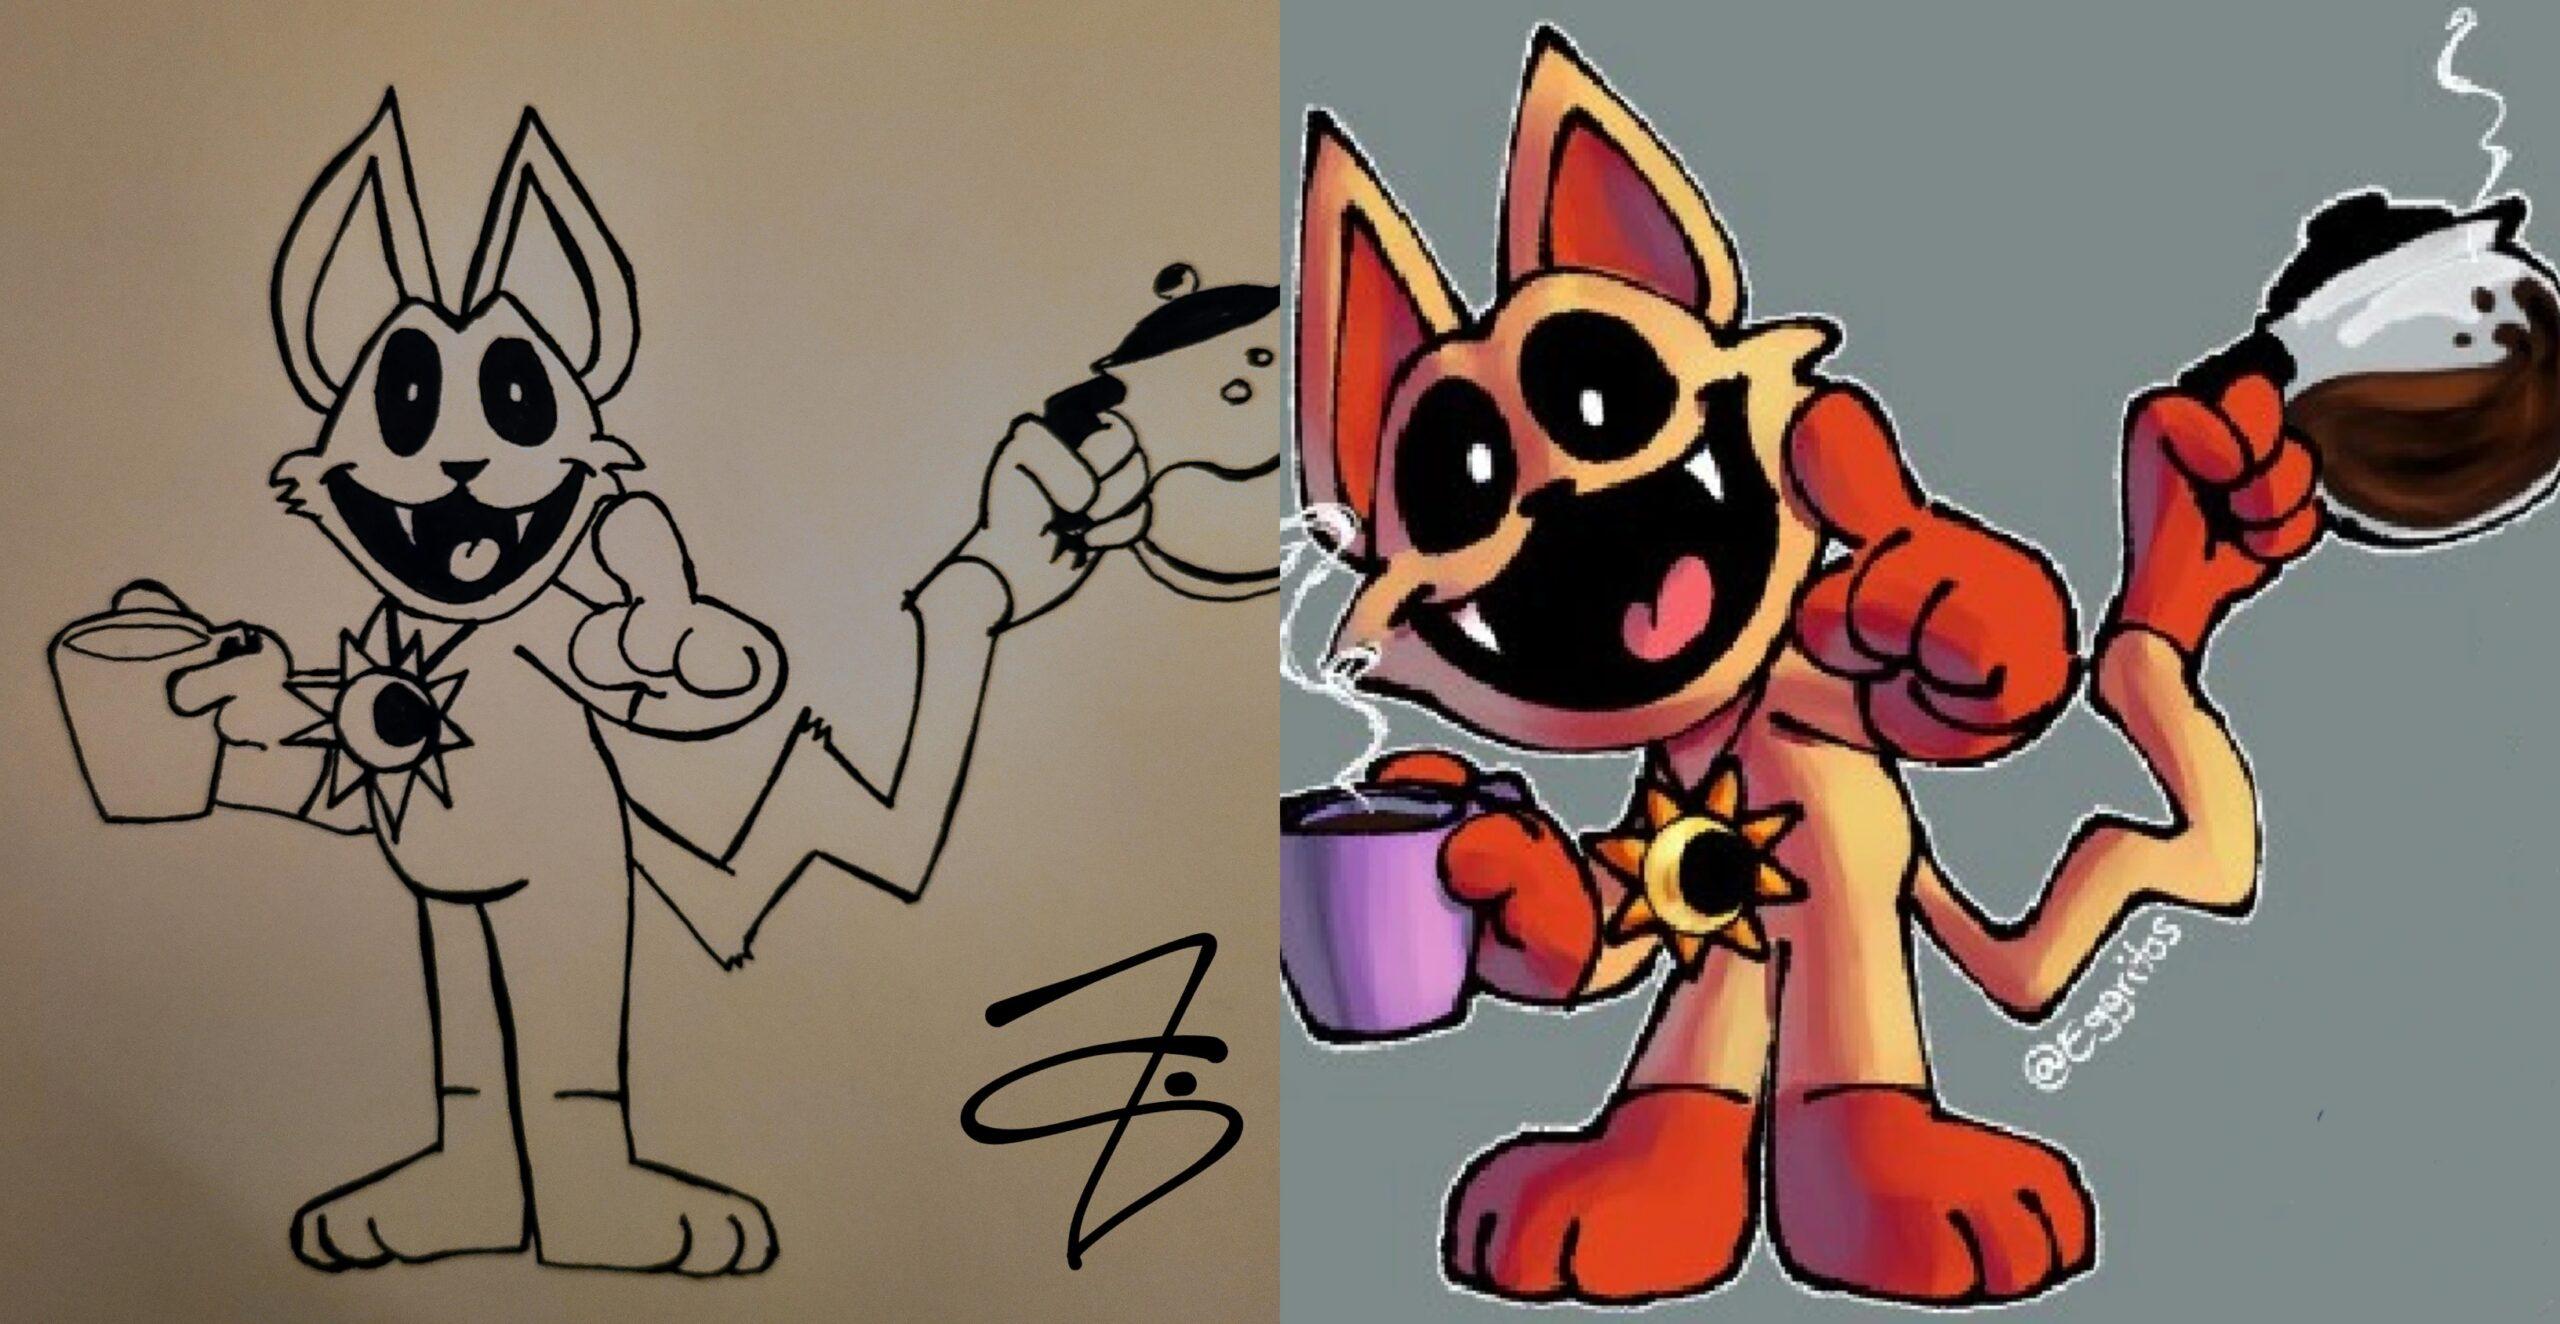
Who is Catfeine in Poppy Playtime?
What is the story behind Catfeine?
Tekken pros argue if Tekken 8 is a good game or nah
Is Tekken 8 too aggressive for the OGs?